macOS Terminal Setup
Introduction
I recently had to re-configure my terminal setup on a new Mac and I forgot how I had configured everything. I started to make some notes but instead I thought I’d publish it here so that I always know where my notes are and it may benefit others.
I typically need to setup my zsh shell environment, terminal emulator, terminal multiplexer and terminal editor. All of which are documented below.
1 - Terminal Emulators
I haven’t really settled completely on a favourite terminal application. The two I use most are iTerm2 and Kitty. I have kind of settled mostly into using Kitty as I prefer the clean look, especially the way it renders fonts.
I also sometime use cool retro term just for the fun aesthetics.
I tend to use a green on black or aqua on black colour scheme.
1.1 - iTerm2
I used to use iTerm2 exclusively because I liked the design and make great use of tabs. However since switching to using tmux a lot more (see below) I found I have less need for the iTerm tabs. That said, iTerm “just works” and apart from setting the colour scheme I dont have to configure anything to use it as I like it.
1.2 - kitty
The design philosophy for kitty states: kitty is designed for power keyboard users. This is a philosophy that aligns with mine. I prefer not to have to take my hands off the keyboard when using the terminal, so the kitty approach suits me.
Kitty has its own window and tab manager built in which can all be driven from the keyboard. However since I use tmux for much of this, I don’t need to use it. Which makes some of kitty’s feature set redundant. That said, it is very slick, easy to use, configurable, fast and clean.
Unlike iTerm2 kitty requires a bit more configuration to make it suit my needs. But its super easy to do. The configuration lives in ~/.config/kitty/ my config can be found on my dotfiles repository.
1.3 - cool-retro-term
Cool retor term is a bit of a gimmicky thing. It styles the terminal window like an old school CRT terminal. You can choose from a bunch of baked in themes that make your terminal look like anything from an IBM Dos style to Apple IIe style. My favorite however is the retro future look. It reminds me of something like Max Headroom. A TV series from my youth.
In the settings for the application you can alter things like the curvature of the screen, scanlines and flicker to get the effec you desire. The animated gif below shows a fairly tame setting with a little bit of noise and a scanline effect. Fun!
2 - zsh
2.1 Oh-my-zsh
To configure by zsh session I use Oh my zsh. I follow the installation instructions on the site to install it. It’s a simple curl command which clones the git runs the install script from the GitHub Repo.
NOTE: If you see a site that offers a curl command that expects you to run an install script in your shell, as Oh My Zsh does, always inspect the install command before running it! Just to be sure of what you are running!
I use the “afowler” theme for oh my zsh theme with PowerLevel 10k to theme the shell prompt.
To change the oh my zsh theme simply alter the setting shown below in .zshrc after oh my zsh is installed:
ZSH_THEME="afowler"
2.2 PowerLevel 10k
PowerLevel 10k is installed by following the instructions on the Powerlevel 10k Theme GitHub repo.
NOTE: Dont skip configuring the font or the terminal icons wont work.
2.1 zplug
I use a bunch of zsh plugins to add some extra functionality to zsh. I use the ZPlug plugin manager. On macOS this can be installed by following the instructions on the GitHub repo. I use homebrew to install it.
The config required in .zshrc is pretty simple. I add the followin block after the powerline10k config (I have addded comments explaining what each plugin does):
export ZPLUG_HOME=/opt/homebrew/opt/zplug
source $ZPLUG_HOME/init.zsh

zplug "zsh-users/zsh-autosuggestions"   # Auto suggest command completions as you type
zplug "zsh-users/zsh-syntax-highlighting", from:github  # Command syntax highlighting
zplug "RobertAudi/tsm"  # tmux session manager. Handy short hand for tmux session management
zplug "bobsoppe/zsh-ssh-agent", use:ssh-agent.zsh, from:github # Setup the ssh agent

if ! zplug check; then
zplug install
fi

zplug load
3 - tmux
I use the terminal multiplexer tmux extensively. Once again, conveniently installed via homebrew. All the shortcuts and commands I use are well covered on this tmux cheatsheet
I add:
if [ “$TMUX” = "" ]; then tmux; fi
to ~/.zshrc to start tmux when zsh starts
3 - NeoVim
I always wanted to make better use of Vi/Vim (my goto terminal editor) and NeoVim makes that possible. However I always found it cumbersome and hard to configure to my liking and so gave up trying to use it for a long time. However after looking for some pre-built configs I found a set of simple configs via a Twitch streamer called bashbunni. She has a GitHub repo for her dotfiles which are nicely curated and I was able to adopt them for my NeoVim setup.
My adapted copy of Bashbunni’s dot files can be found in my dotfiles repo.
The first step is to install. NeoVim this can be done using good old Homebrew:
brew install neovim
NeoVim is then installed as: nvim
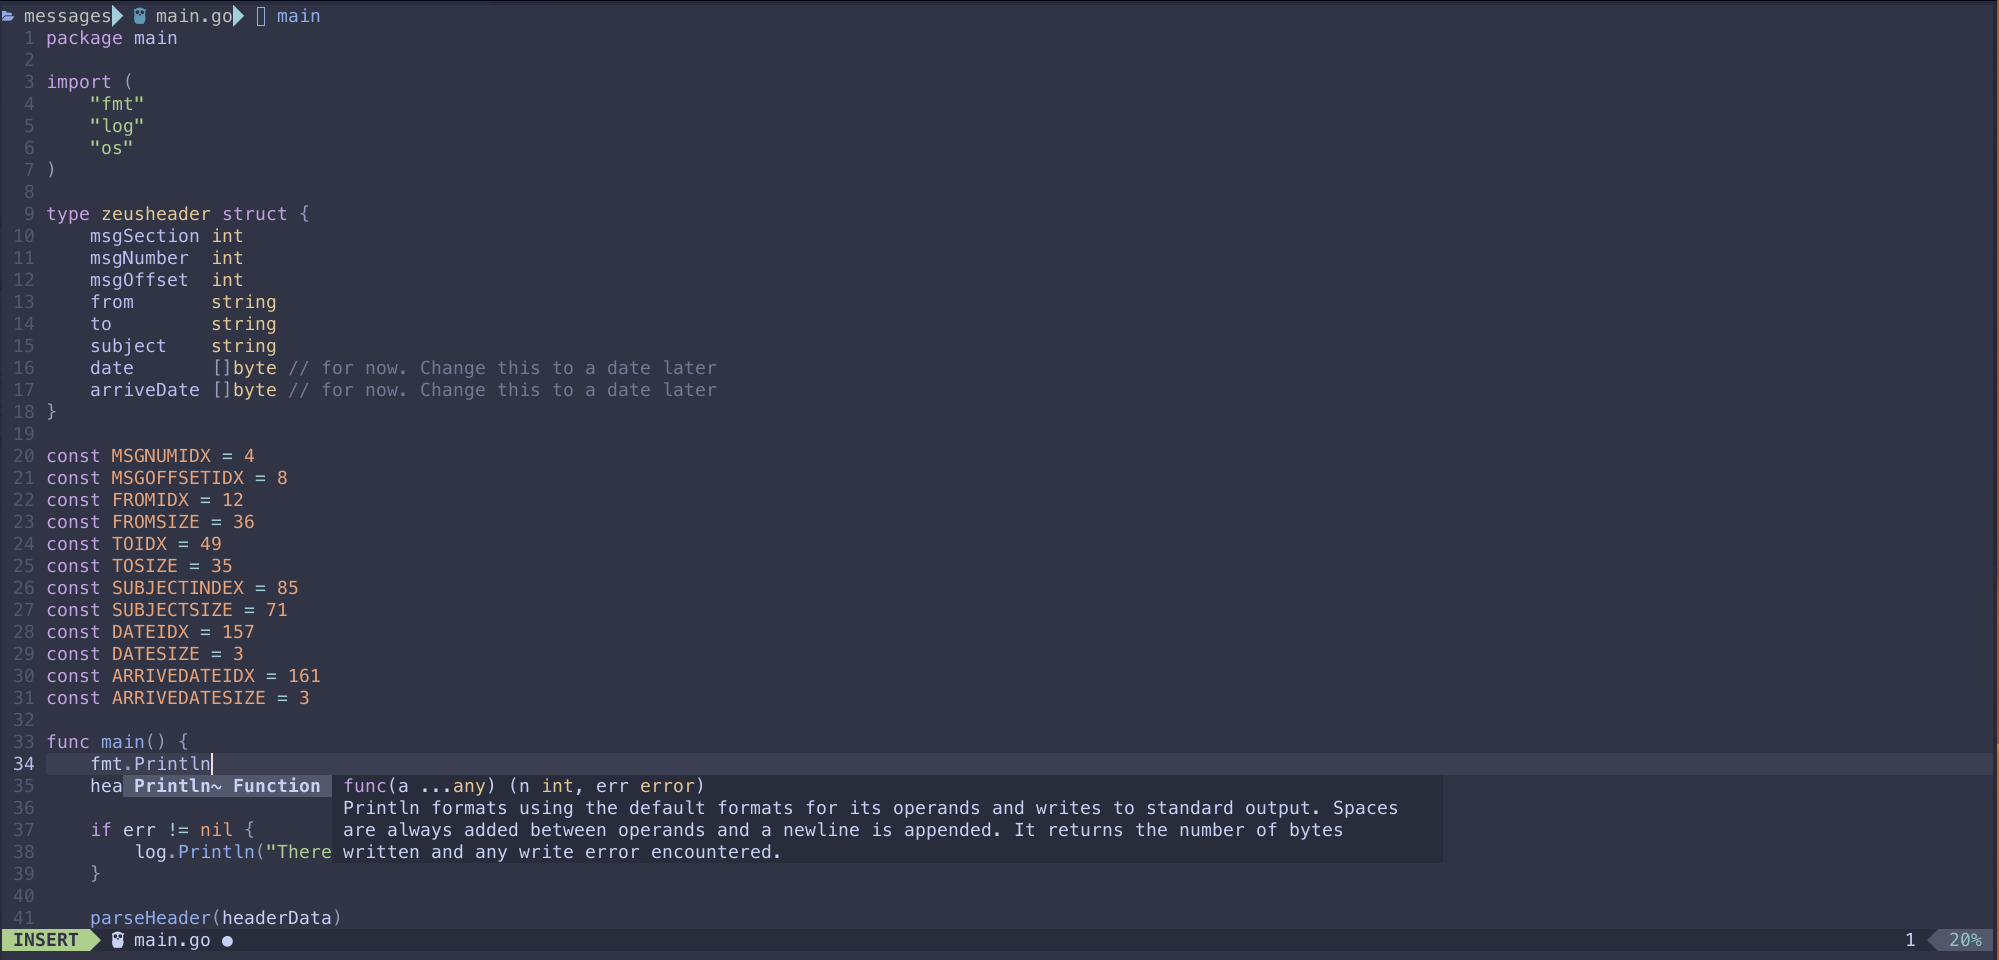
The vanilla install doesn’t look or feel much different from the stock vim. The magic happens when you configure it and install a bunch of plugins. My primary requirement was to enable the go language server and linting so that I could get all the nice auto completion and documentation features in Vim.
To do this, clone and then copy the .config/nvim directory from my GitHub repo.
You can get my slightly updated and adjusted copy of bashbunni’s NeoVim config from my GitHub repo.
Copy the .config/nvim directory to ~/.config/nvim
Starting nvim after copying the config in place will result in an unholy mess of weird Lua errors. Fear not! All that is required is the installation of the plugins, which are currently missing.
The plugin system uses a plugin engine called mason and packer. Packer requires some initialisation to install all the plugins. To do this type:
:PackerInstall
Which will download and install the configured plugins. Then:
:PackerCompile
To optimise packer at startup.
This will install and configure the base set of plugins I use primarily for Go development.
You don’t need worry to much about the details of the plugin systems to get going for now, but Mason is especially useful for installing Language Server Protocol (LSP) plugins, linters and Debug Adapter Protocol (DAP) plugins. The mason GitHub repo has all the details.
To validate everything is working you can run type:
:checkhealth
In NeoVim and it will check if everything is configured and running properly. If something isn’t right it will give you a suggestion of how to fix it. It’s pretty neat.
The end result, when editing a Go source file should look like this (note the function hints and completion):