Installing MacOS on VMWare Fusion - Including Betas
Introduction
It’s WWDC time again and its time to check out the latest Beta and test things. MacOS Big Sur is the latest and may be last version of MacOS that will run in VMWare as Apple move away from Intel based Macs and towards ARM. None the less, I want to install it in a VM and that means taking to the web to find instructions because I keep forgetting.
So rather than waste all that effort again I have turned it into this article as a record for me to remember how to do it without having to hunt around. I will try to keep this up to date so it is a decent reference for each OS version.
Before I get into my article, in my search I found this site: Mr. Macintosh on how to install MacOS Big Sur on VMWare Fusion and Parallels. That article goes through how to do some of what is written here and is an excellent reference. However I found it a little hard to follow so I wanted to make sure I clearly defined all the steps I took here. That said, the site is an excellent resource for this sort of material.
Additionally, there are some easy to use scripts on this GitHub Repo (going by the name of ‘myspaghetti’) to install the latest version of MacOS on VirtualBox. I am not sure if you can then install the Beta software using this as a base install as I have not tried that yet. I am a VMWare Fusion user, so these are the instructions for VMWare.
This guide is for VMWare Fusion running on a Mac and I can confirm the steps below will work for installing macOS 10.15.6 Catalina and MacOS 11 (or is it 10.16?) Big Sur Beta 2. It is possible these same instructions will also work for VMWare Workstation on a Windows PC although I have not tested this.
Overview
The instructions below first get you a MacOS VM for any current or previous MacOS version that Apple makes available. Then from there an existing MacOS VM can be configured to install the Beta software.
In my opinion, the best thing to do if you want to use the beta’s is to keep a current MacOS VM updated and ready, then clone it and follow the instructions below to install the beta’s when they are available.
The general problem with the MacOS beta’s on VMWare is that the current VMWare Fusion product at the time of the Beta releases does not support them out of the box and is tuned to support the released versions. So it can be a bit of a coin toss for getting them working especially if the new OS expects a certain hardware level to run. However it is possible to manually alter the VM hardware config to convince MacOS Beta software to install and run. This article covers how to do all that and get a Beta OS up and running.
Get the MacOS Installer
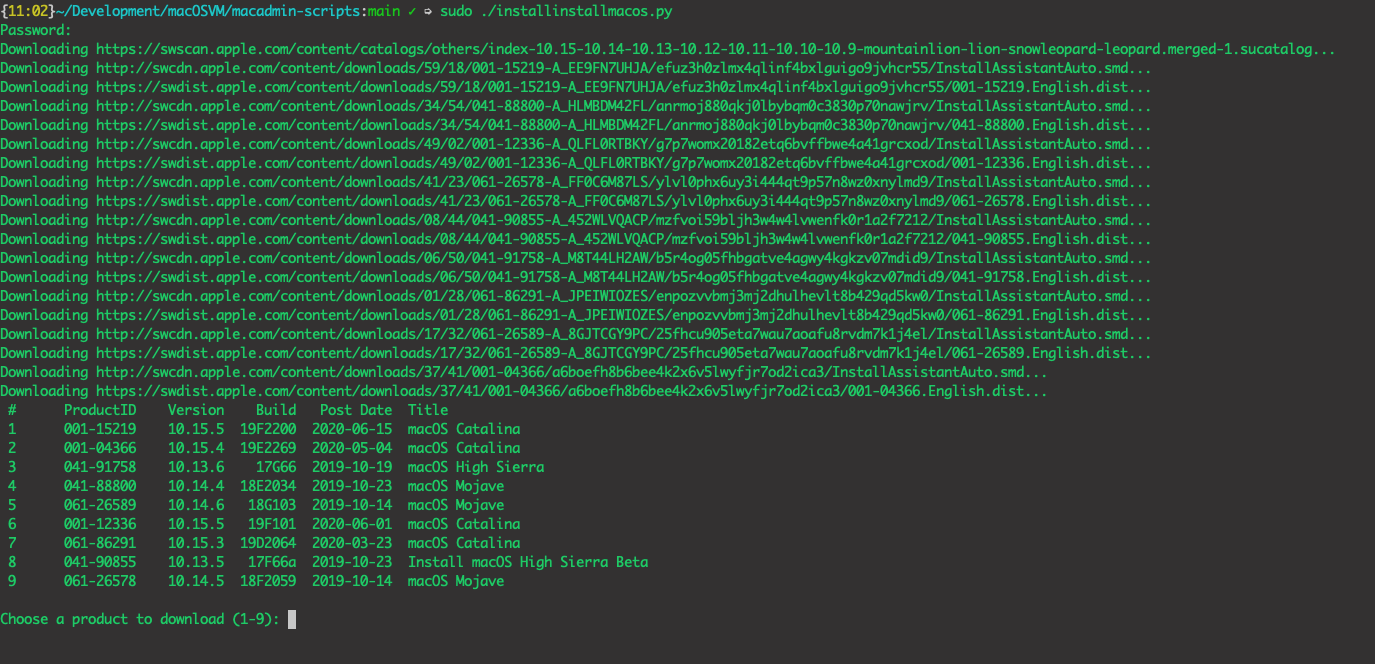
The installmacos.py script as referenced on the Mr. Macintosh site greatly simplifies downloading and assembling an installer from the repositories provided by Apple. Here is what to do:
First download the installmacos.py python script or clone the macadmin-scripts repository to get a copy locally
On attempting to the script, you will find it needs to be run as
root: Caution - I highly recommend inspecting the script before doing this! If you aren’t comfortable with this, don’t understand what running as root means or what the script is about to do, you should stop here. If you are comfortable with this then carry on and run
 sudo ./installmacos.pyThe script will present a menu of choices as shown below. Choose the OS version required from the menu. This will then download and assemble an installer image.
At this stage if you have the latest version of VMWare Fusion and it supports the release version of MacOS or the at least the version that you have just downloaded, you will now be able to relatively easily install a copy of MacOS on VMWare. There are a couple of changes required during and post install that will set you up for the Beta install later, but from here you can get a current version of MacOS up and running relatively quickly.
Installing a Release Version of MacOS on VMWare Fusion
This section might be a bit of a dummies guide, but it is surprising how confusing some of the instructions out there can be. So I wanted to break it right down here to make it super clear.
Once you have the install media created as per the section above, its fairly simple to create a running MacOS VM:
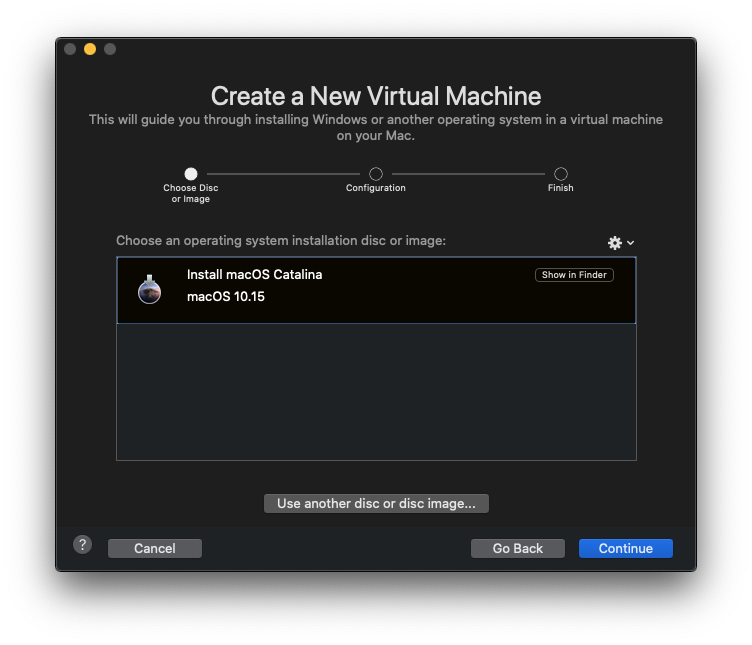
Open VMWare Fusion and add a new VM. You should see the following: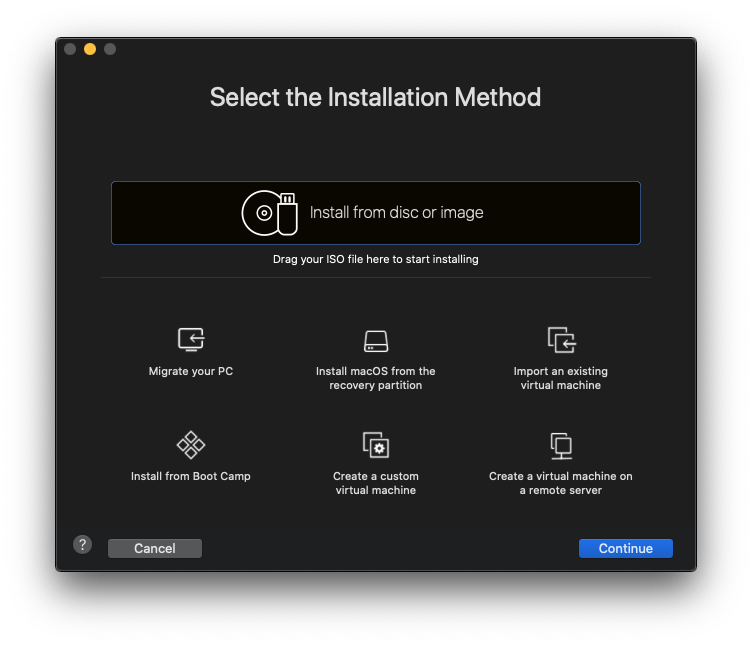
Mount the .dmg file created in the section above. It should contain the installer: 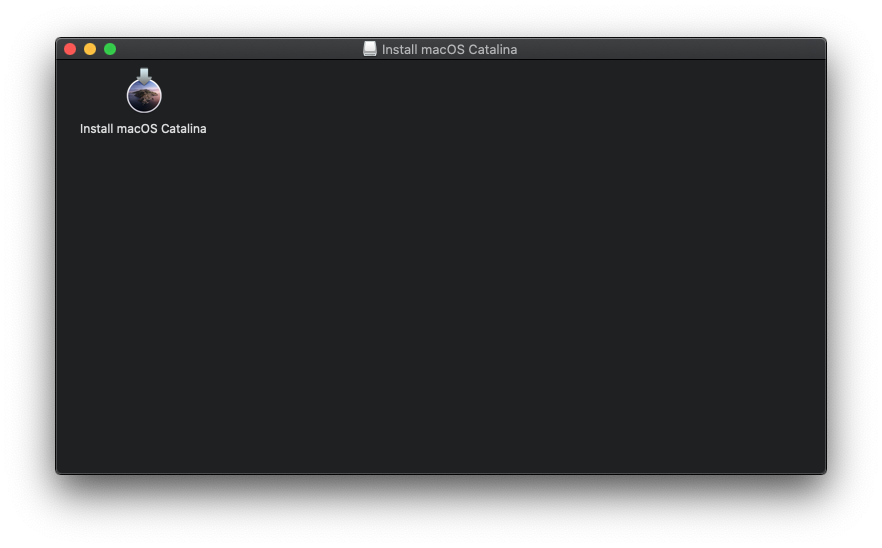
After clicking continue, you will see a window that looks like: 
After clicking continue, VMWare will use the installer image to create the install media. This can take some time depending on your machine. Once completed, the machine is ready to boot to the install. However I recommend customising some settings before booting the machine. Primarily to adjust the disk size.
Clicking the Customize Settings button bring up the following screen: 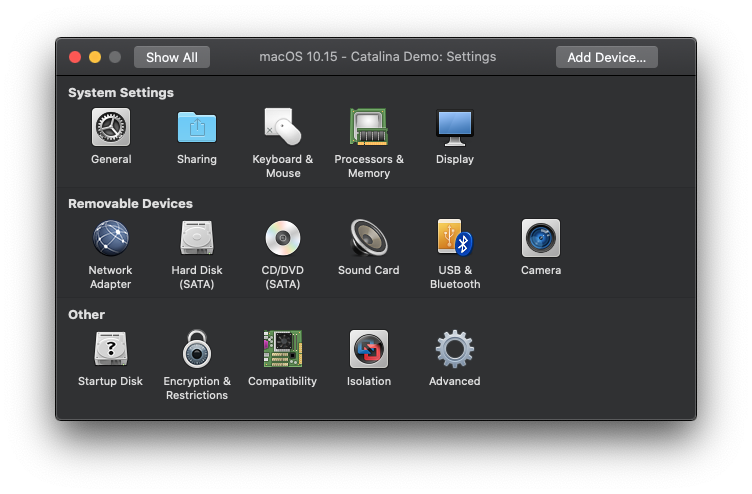
Hard Disks (SATA) option and change the disk size to something around 100GB. 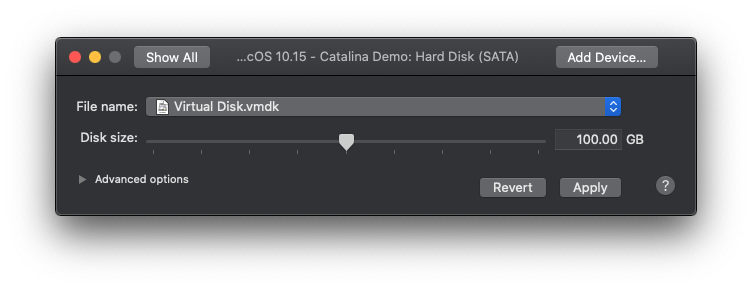
Once the customisations are complete, boot the VM which will boot into MacOS Utilities: 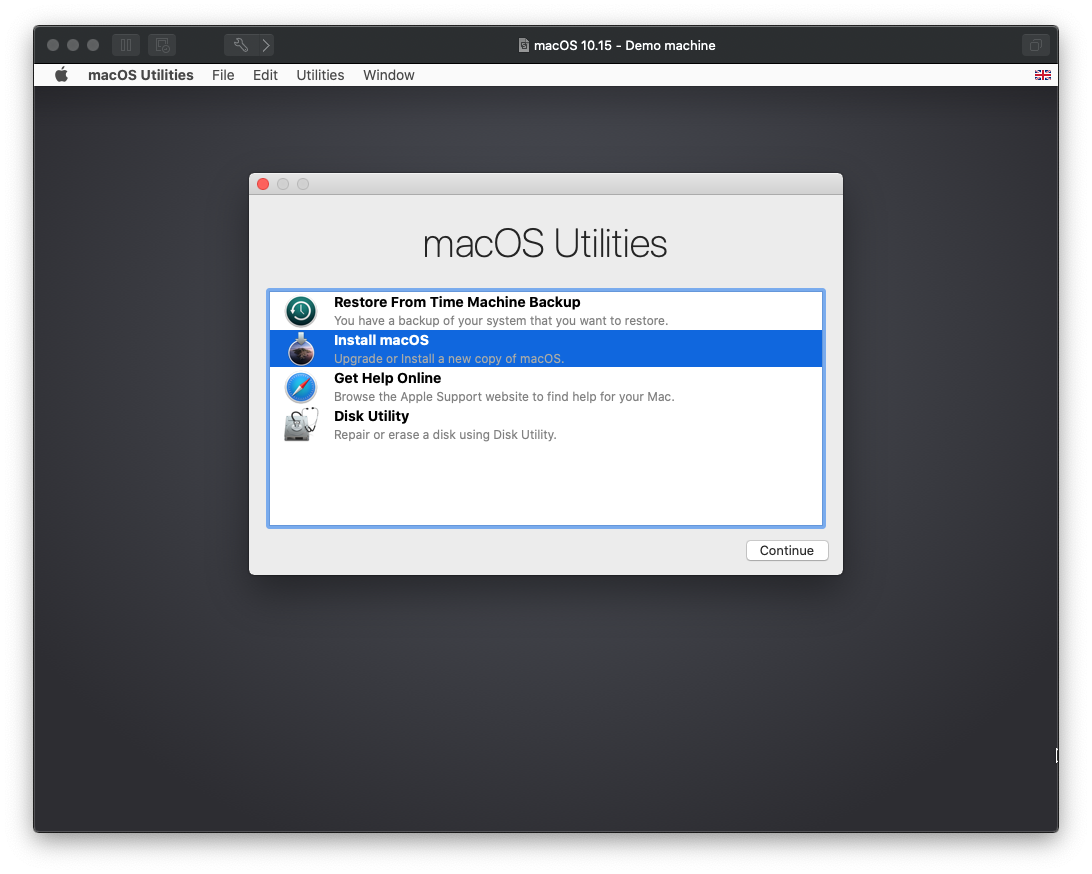
Install MacOS option to kick off the installer. This will take some time depending on your host machine.
Once the install completes you will have a running MacOS VM: 
Resizing the Disk
First I suggest first rebooting the machine to ensure the current VM is running as expected. I have found sometimes MacOS will install but will fail to boot after a restart from the installer. This is usually due to VMWare not supporting the particular version so if you stick to the release version and a version of VMWare Fusion that supports it then this probably won’t happen. But just to be sure, reboot the machine all the same.
Next, I suggest using VMWare Fusion’s snapshot feature to take a snapshot of your VM so that if there is any issue you can revert back to a known good position. 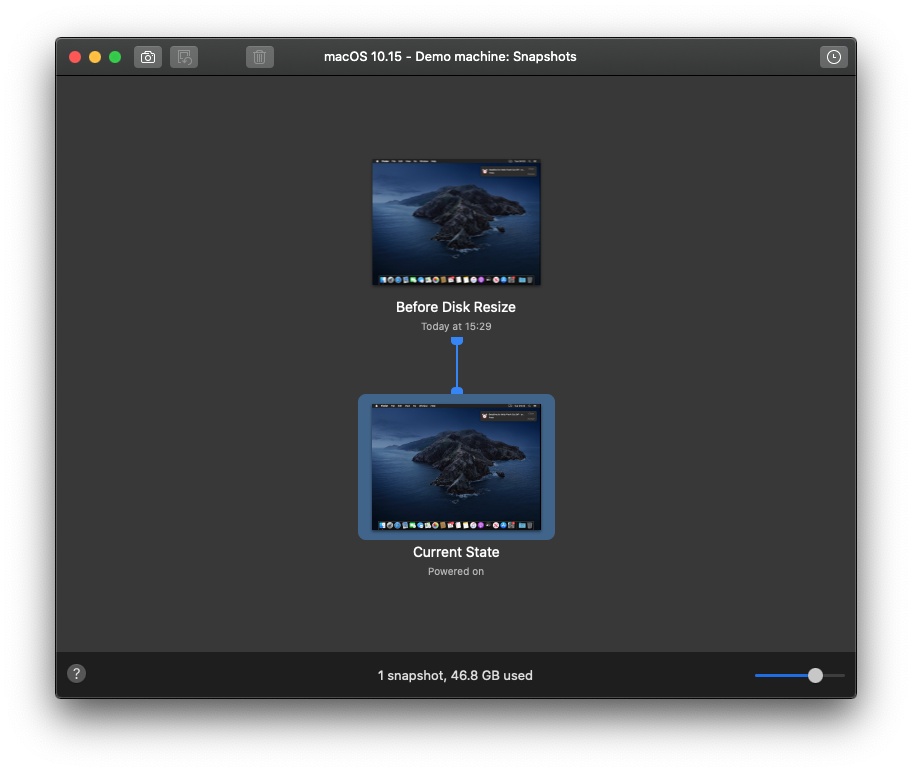
Inside the MacOS Guest, open disk utility and you will see the APFS volumes on a disk (actually a partition) size of ~40GB: 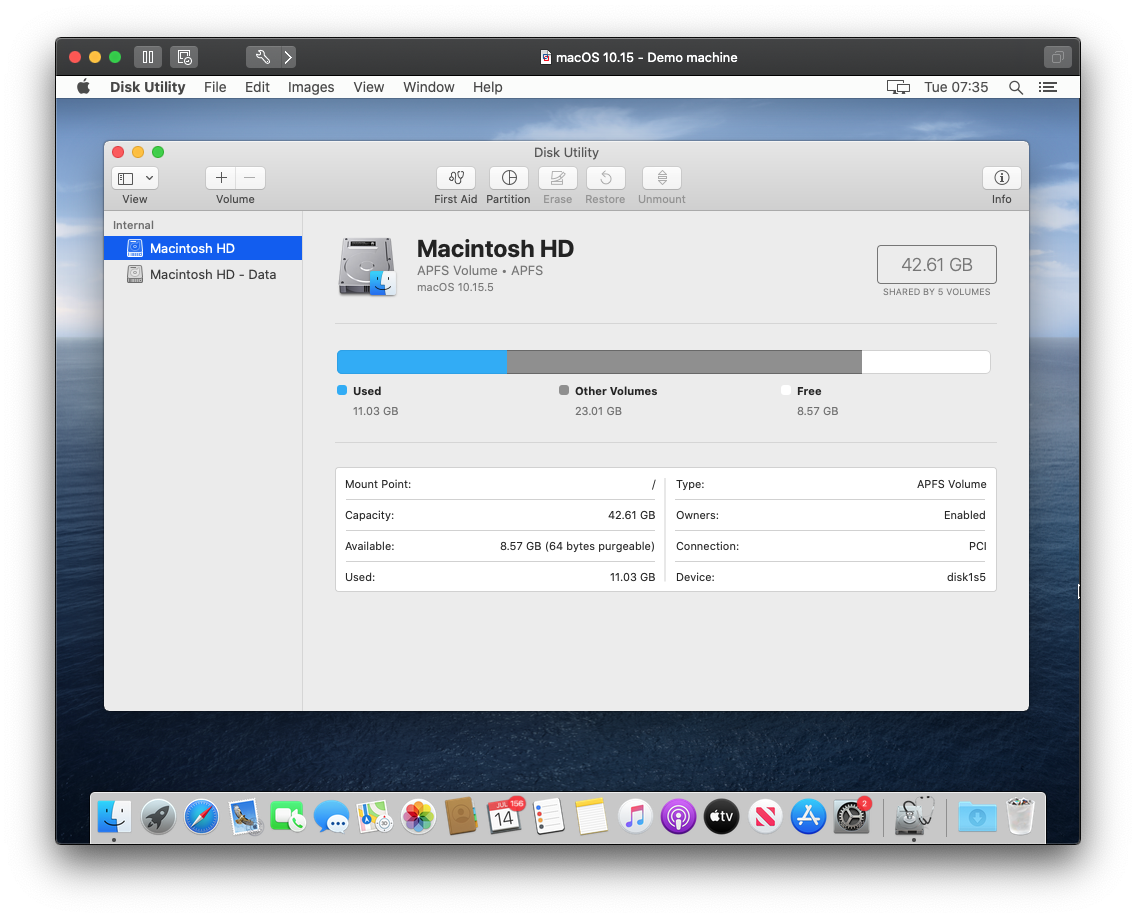
Partition button on the toolbar and you will see the following dialog: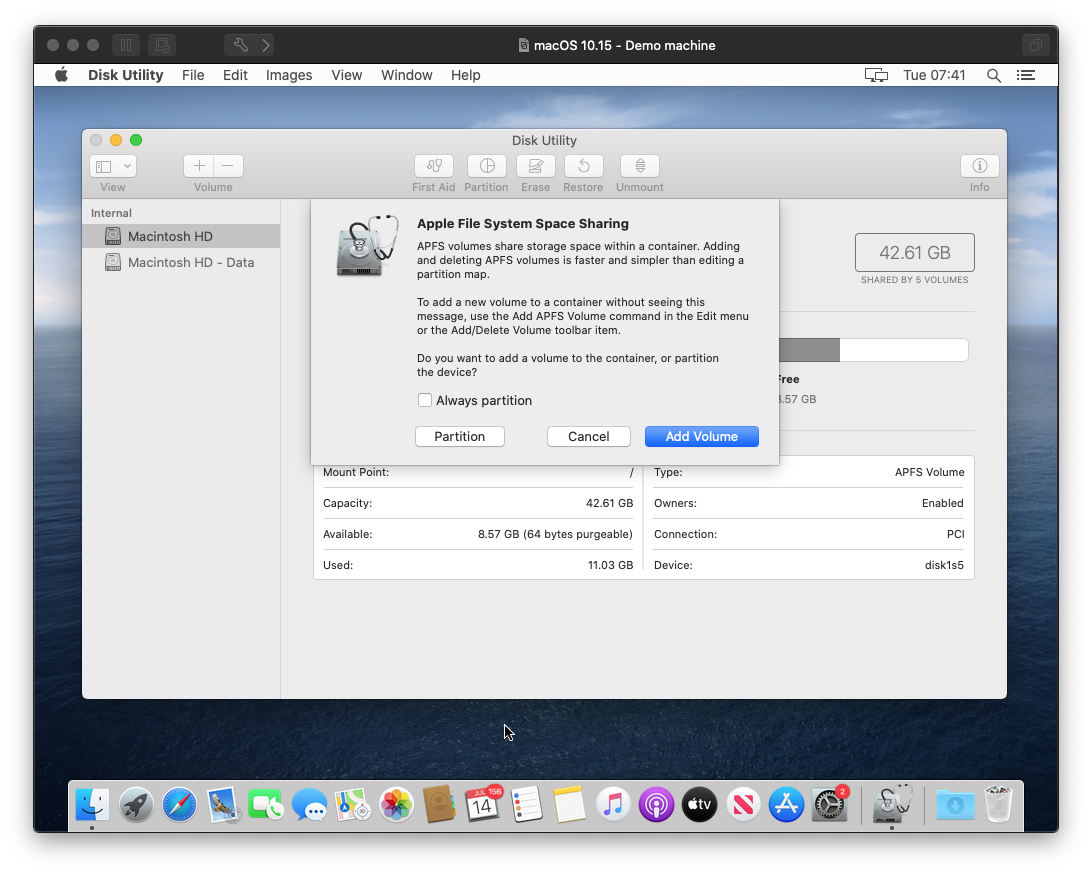
Partition button and you will see the following: 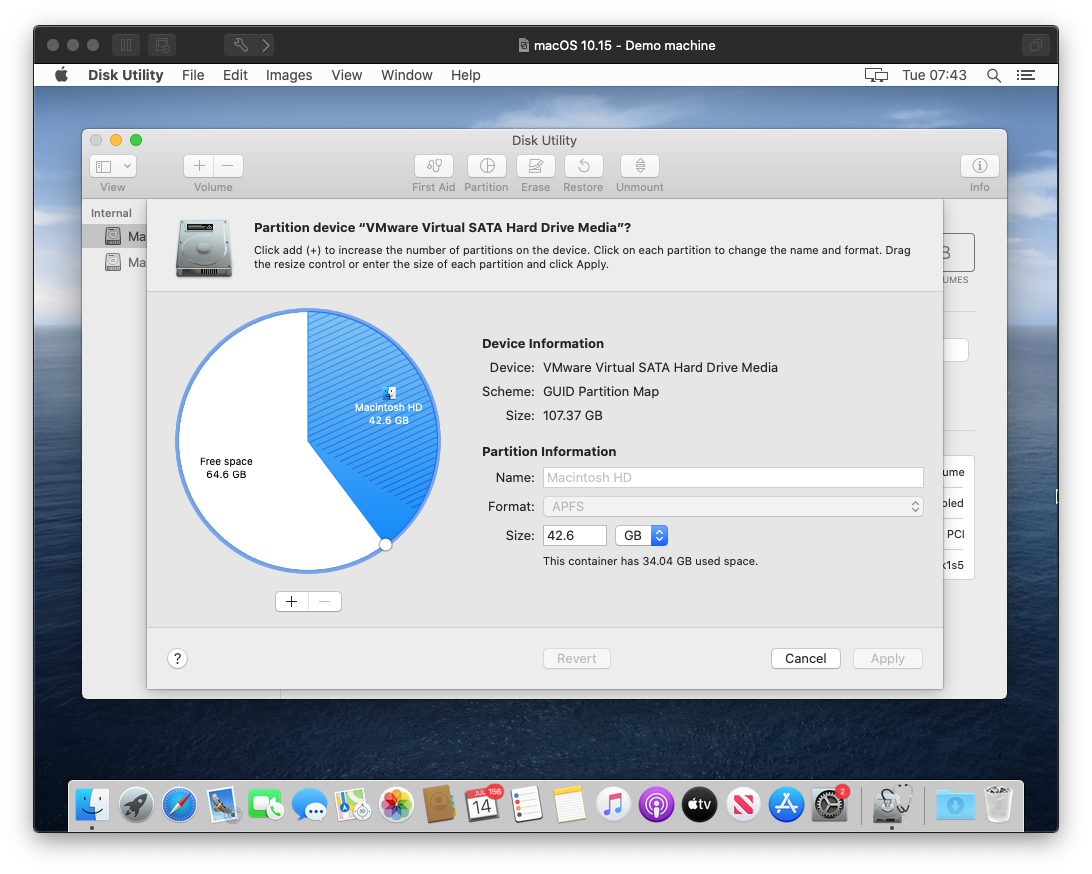
This is where the rest of the 100GB disk is hiding. It’s in the form of a partition of free space that hasn’t yet been formatted. Rather than format and use it as its own distinct partition, we want to add this free space to the system partition.
I found this next step a bit counter intuitive at first, but here is what is needed. First select the free space from the pie chart: 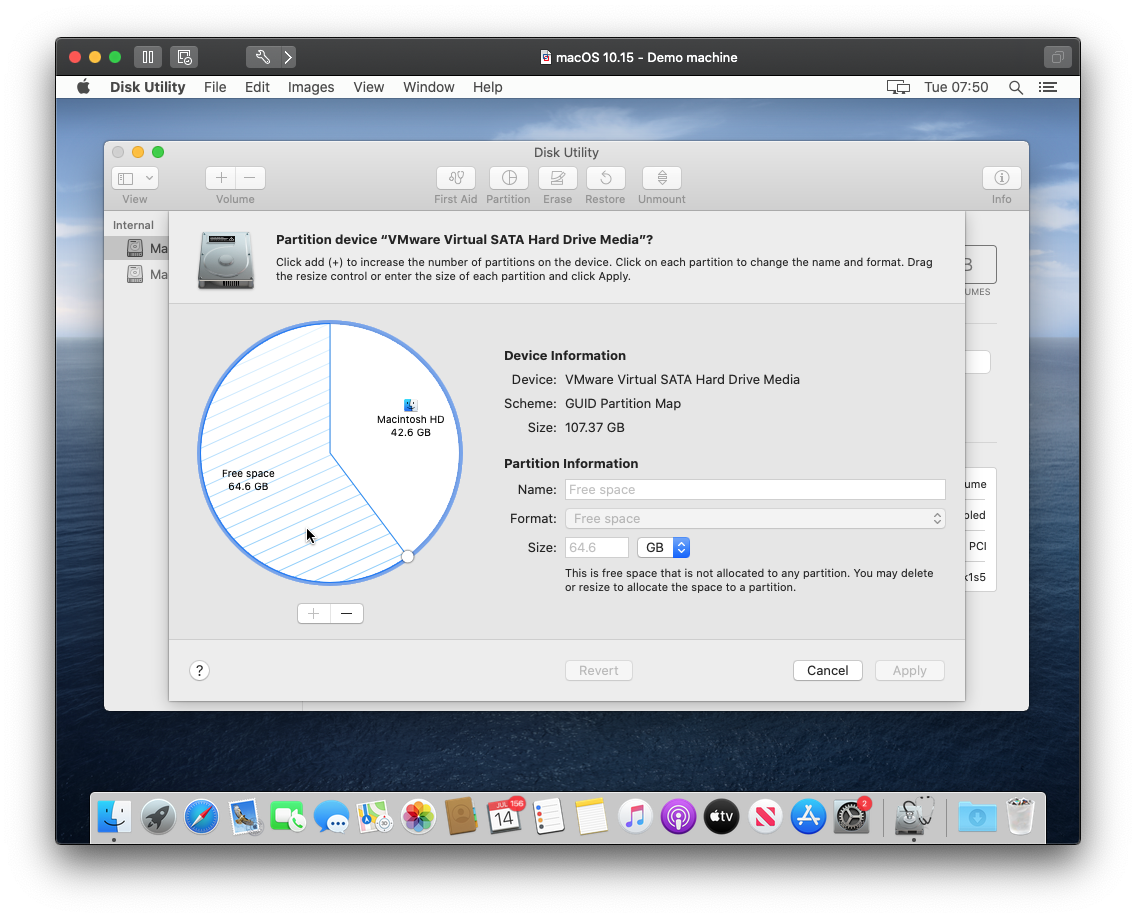
Then click the - button below the pie chart to remove the empty partition. This will remove the empty space partition and reallocate the space to the system partition: 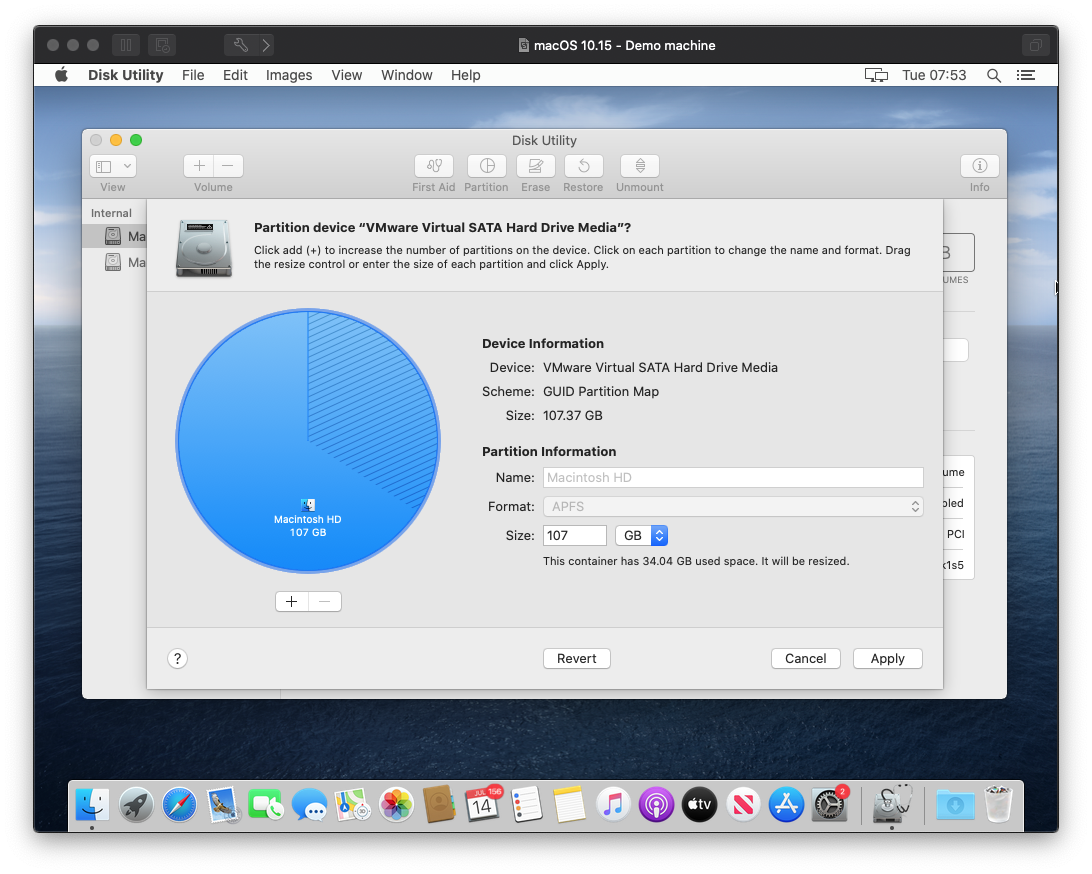
Apply to apply the changes. MacOS will then proceed to remove the old partition and resize the system partition: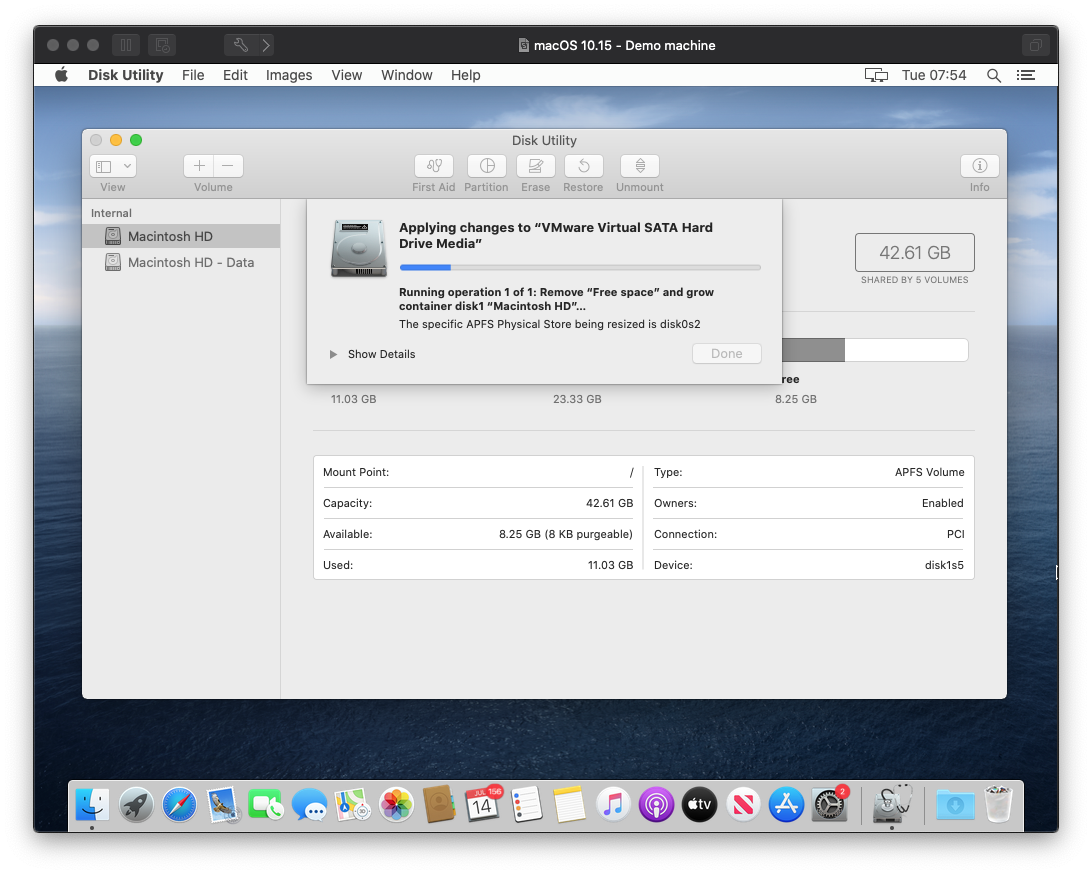
All going to plan the operation should complete successfully: 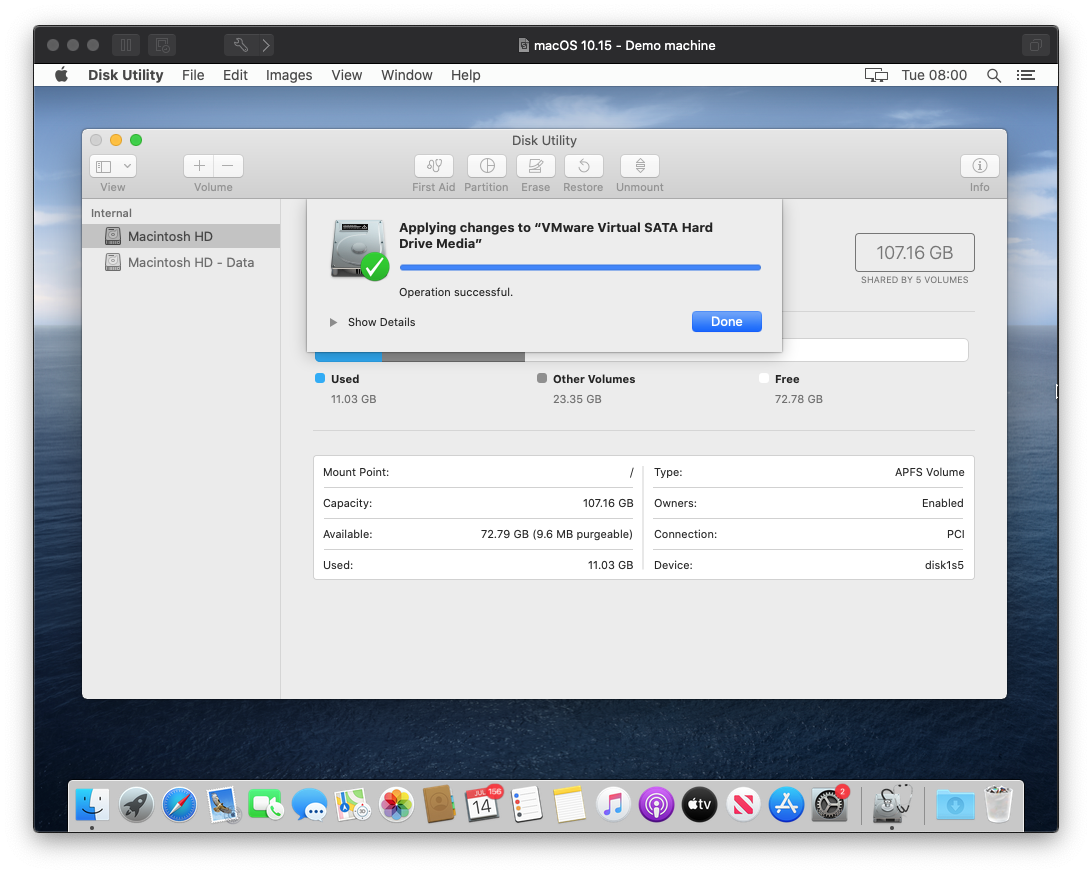
At this point I recommend another reboot just to make sure everything is still working as expected.
Now you have a VM with a 100GB system disk running the latest release version of MacOS. From here we can install the Beta software if we wish. The steps to do that are covered below.
Preparing the VM to Install a Beta Release
Clones
I use VMWare Fusion Pro which allows me to make linked clones or full clones of VM’s. Before I embark on any testing with the beta’s I usually make a linked clone of my working MacOS VM so that I don’t mess up my test machine and/or I have a fall back position.
A linked clone create a clone that relies on its parent for most of its data and only contains differences, this will save on space as the clone will take up a fraction of the space of the parent.
A full clone is a complete independent copy of the VM derived from the current state of the parent machine.
I suggest making use of this feature if you have VMWare Pro, make a manual a backup of your on disk VM.
Hardware Config Changes
Before we can install the new Beta we need to manually add a few settings to our VM config. This is because VMWare Fusion knows nothing about the new OS and the hardware config it presents to the operating system may prevent it from installing a beta. When VMWare update versions they include all this detail as part of the create VM wizard (that first drag and drop step above). Since the Beta isn’t known to VMWare there is no automated wizard to configure it so we need to poke this detail in manually.
Ensure the VM is shutdown, then use the Show in Finder context menu option on your VM in the VM Library to locate the VM files on disk: 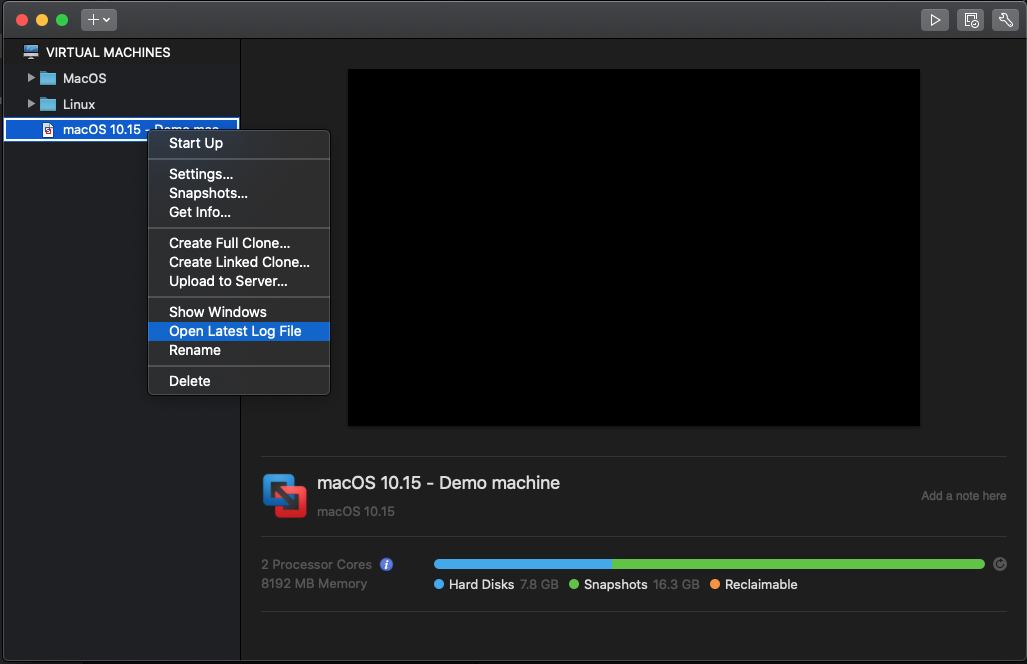
In finder you will see a file of kind VM Bundle. Finder will show it as a single file, but it’s actually a directory. You need to use the Show Package Contents context menu option to browse the contents of the package: 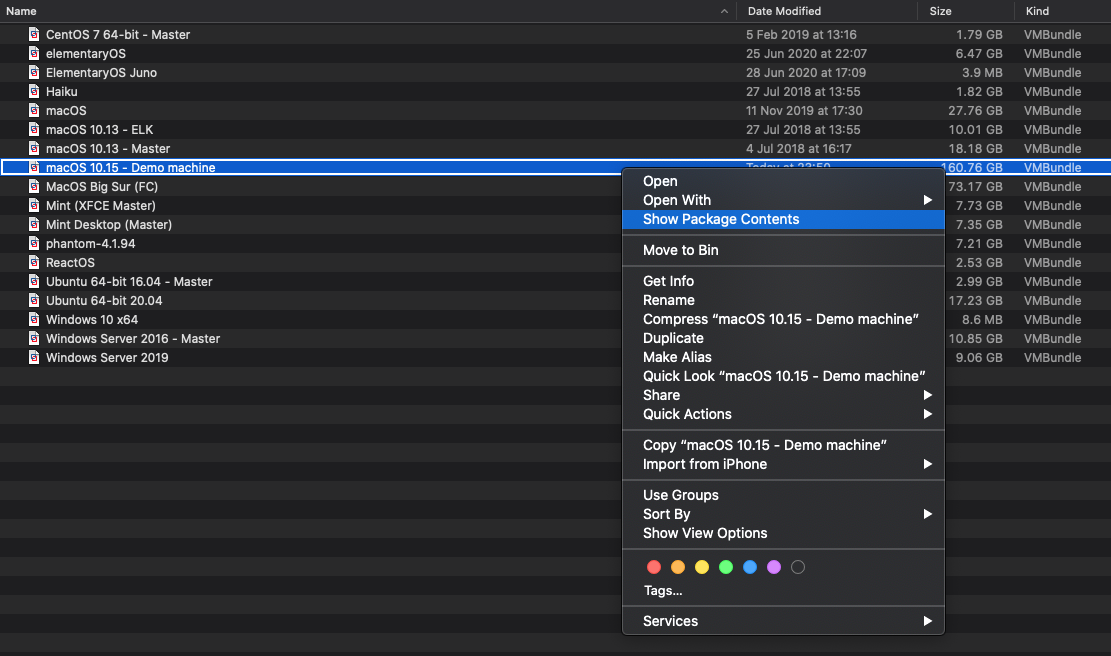
Once this is done, locate the .vmx file for your MacOS VM, which in this case is called macOS 10.15 - Demo machine.vmx: 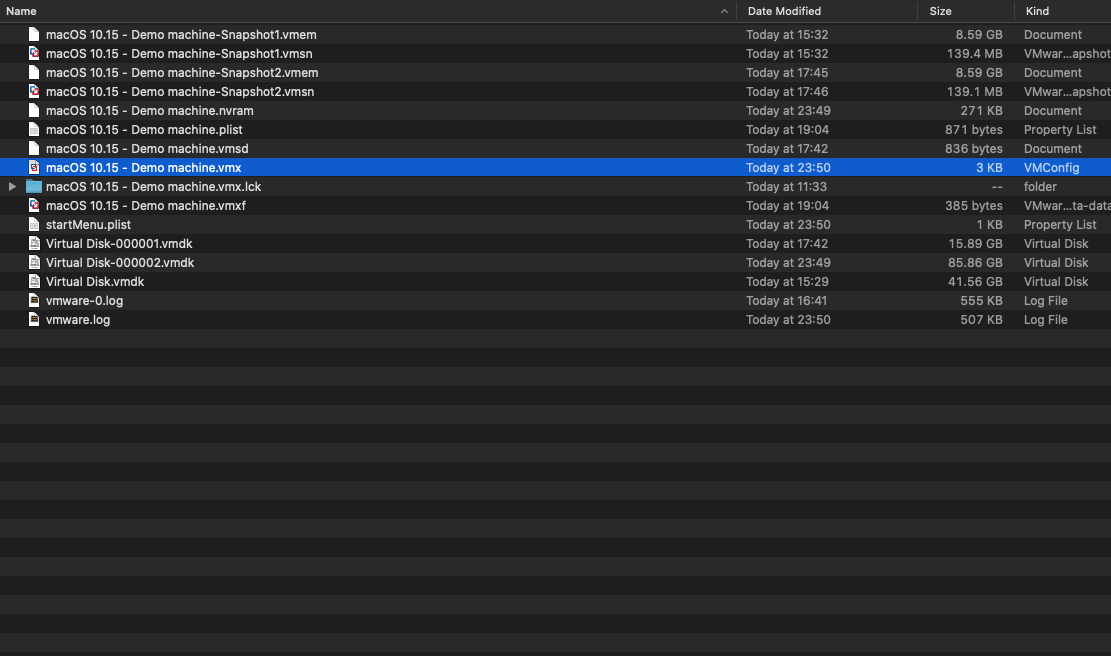
This is actually a text file containing all the config details for the VM in a key value format. Open this file in your favourite text editor: 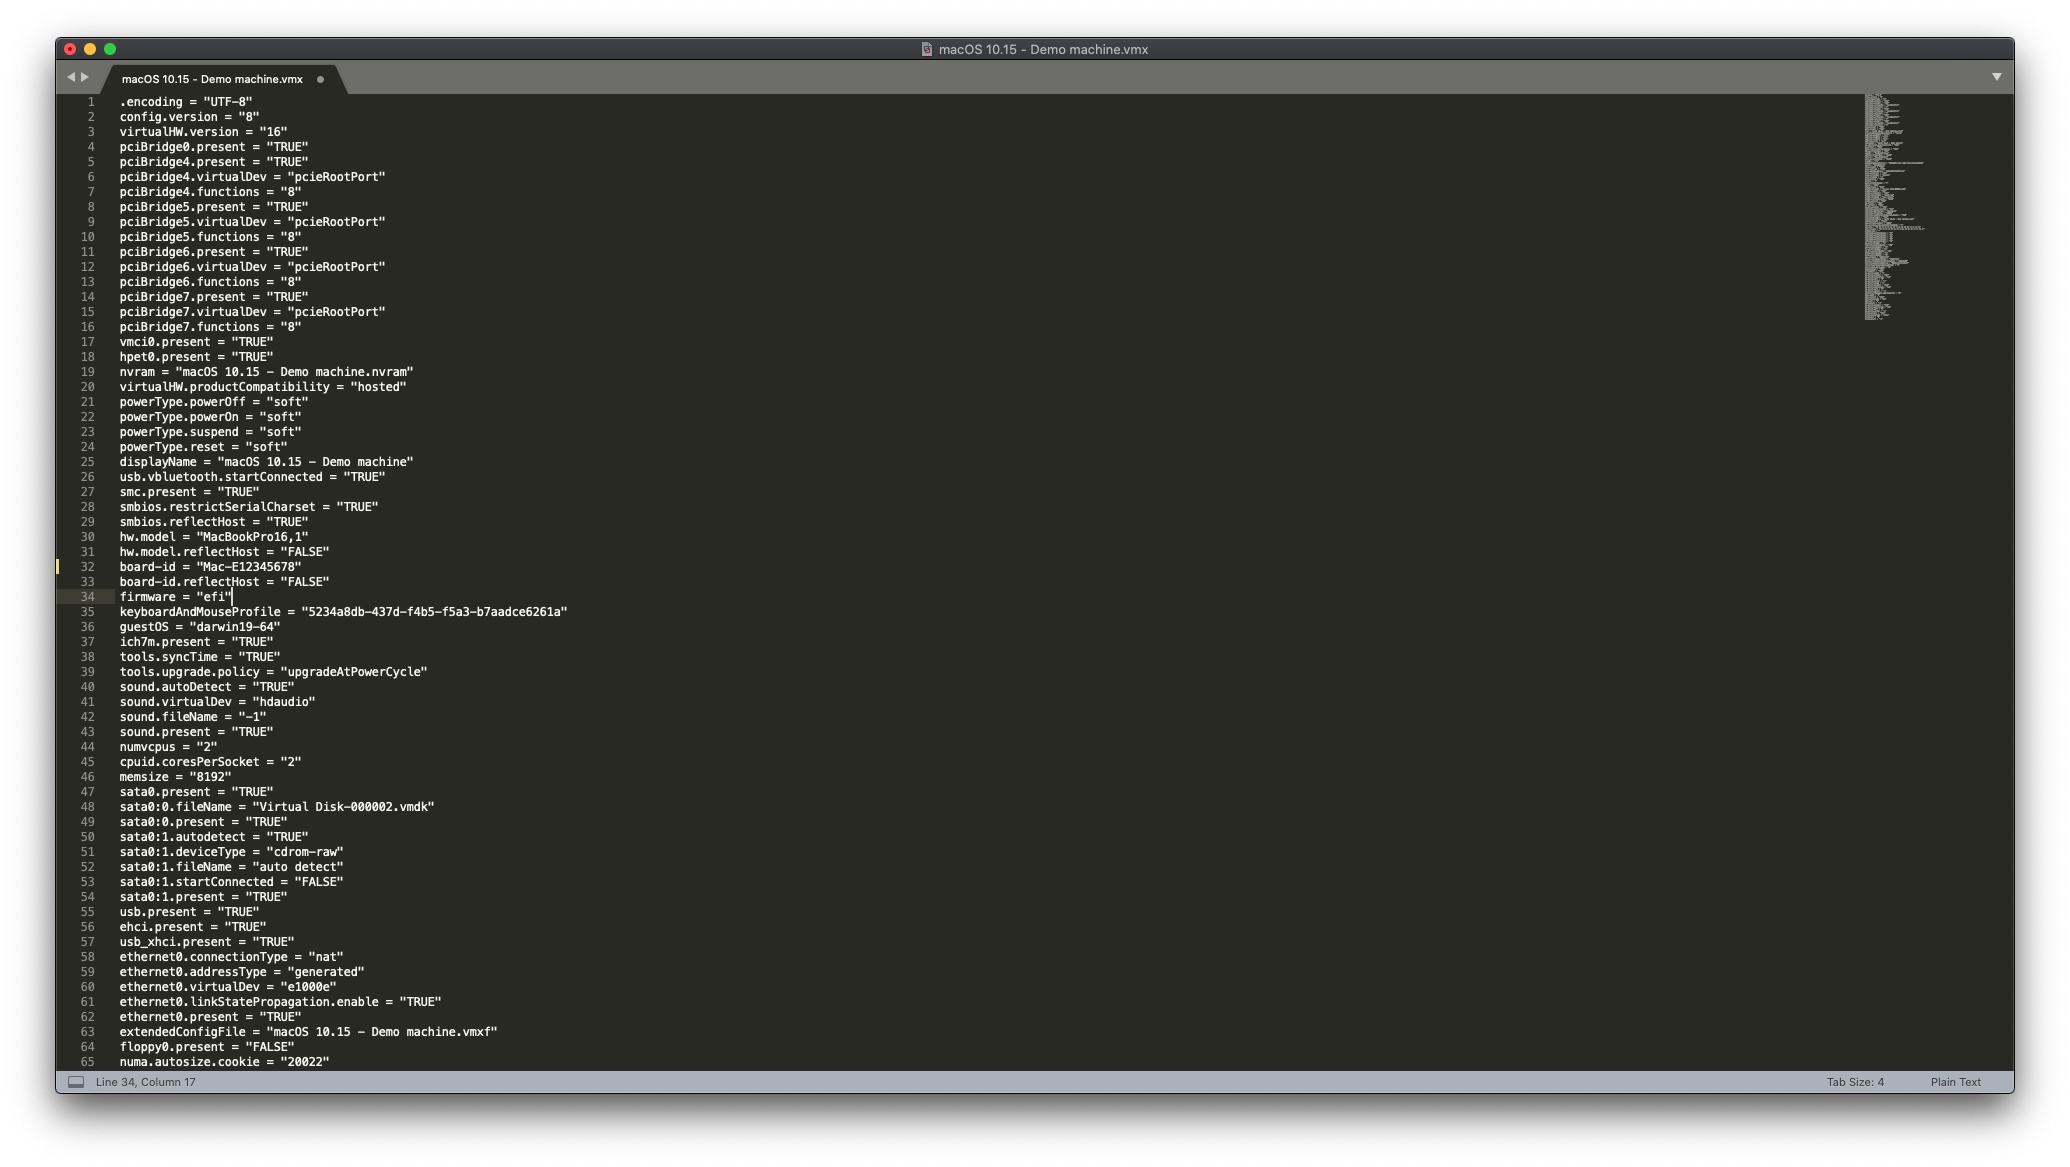
There are a few settings we need to adjust or add. These setting ensure the hardware looks the most like a “regular” Mac to the OS. The critical items for the Beta installs are hw.model and board-id. Those must be changed to have any chance of booting a Beta.
Here are all the relevant the configuration settings:
hw.model - The Beta will only install on certain hardware, so we need to tell VMWare to present a particular hardware model to the OS to allow it to install and boot. Therefore add the line:
hw.model = "MacBookPro16,1"to the vmx file if you want to “pretend” to be a 16" Mac Book Pro.hw.model.reflectHost - I am not sure if adding the hw.model setting overrides this by default, but its a good idea to tell VMWare to not reflect the host hardware model into the VM. Add
hw.model.reflectHost = "FALSE"to the config.board-id - We need to tell VMWare to pretend to be a specific Mac because the OS Installer checks to see if the hardware is compatible. Now… I am not sure how legit it is to share these ID’s. If you have an late enough model Mac relative to the Beta, you can grab the board id from your machine using the I/O Kit registry tool:
ioregby issuing the following command:ioreg -lp IOService | grep board-id. If however you don’t have a current model Mac to hand OR you are doing this on Windows or Linux, then the Mr Macintosh site publishes a list of them. Use which ever is the most convienient mechanism to get a hardware ID that matches the hw.model setting and add the setting:board-id = "The Board ID you discovered"i.e.board-id = "Mac-E12345678"or whatever it happens to be.board-id.reflectHost - As with hw.model.reflectHost, I am not sure if this is ignored when a specific board-id is set, but for safety add:
board-id.reflectHost = "FALSE"to the configsmbios.reflectHost - If you are running on a Mac, you should set this to:
smbios.reflectHost = "TRUE"if not set it tosmbios.reflectHost = "FALSE". This reflects the host bios into the virtual hardware.smc.present - Again if you are running on a Mac this can be set to:
smc.present = "TRUE"to present the native System Management Controller to the VM. If you are not running on a Mac then set this to:smc.present = "FALSE"
Once these settings have been added or changed accordingly, save the vmx file and boot up the VM. All going to plan, the VM should boot as normal but it will be configured as per the hardware settings defined above such the the OS believes it’s running on specific hardware required to satisfy the requirements for the Beta. First boot may take a few minutes as the OS probably thinks its booting on different hardware for last time it booted.
Installing the Beta Release
For this next step, depending on where things are in the release cycle for the Beta OS’s you may require an Apple Developer account to download the beta software. The following steps are all done inside the running MacOS VM
First open Safari on the VM guest and download the MacOS Beta utility from either the developer portal or the Beta release page on the Apple website: 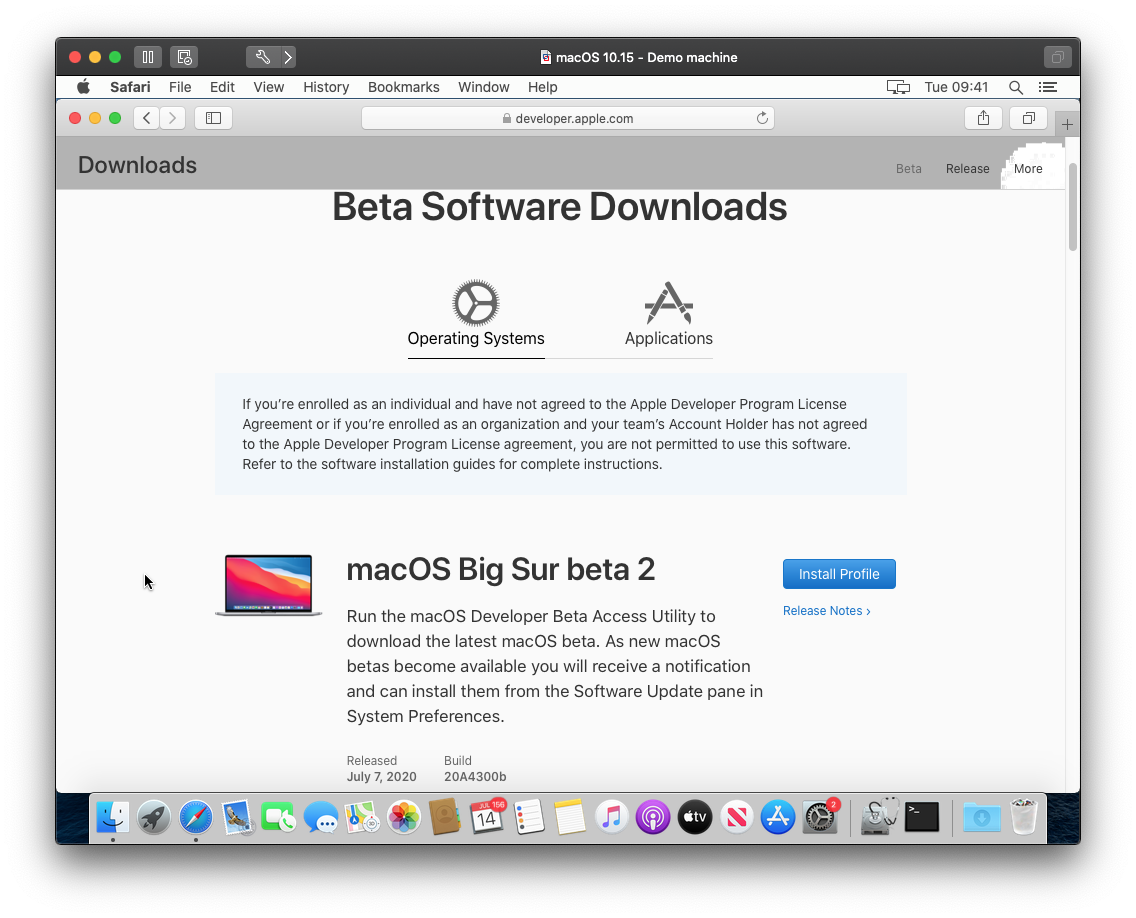
Run the beta tool and this will then trigger a software update notification. Click Install on the notification and click Upgrade Now to start downloading the Beta Installer: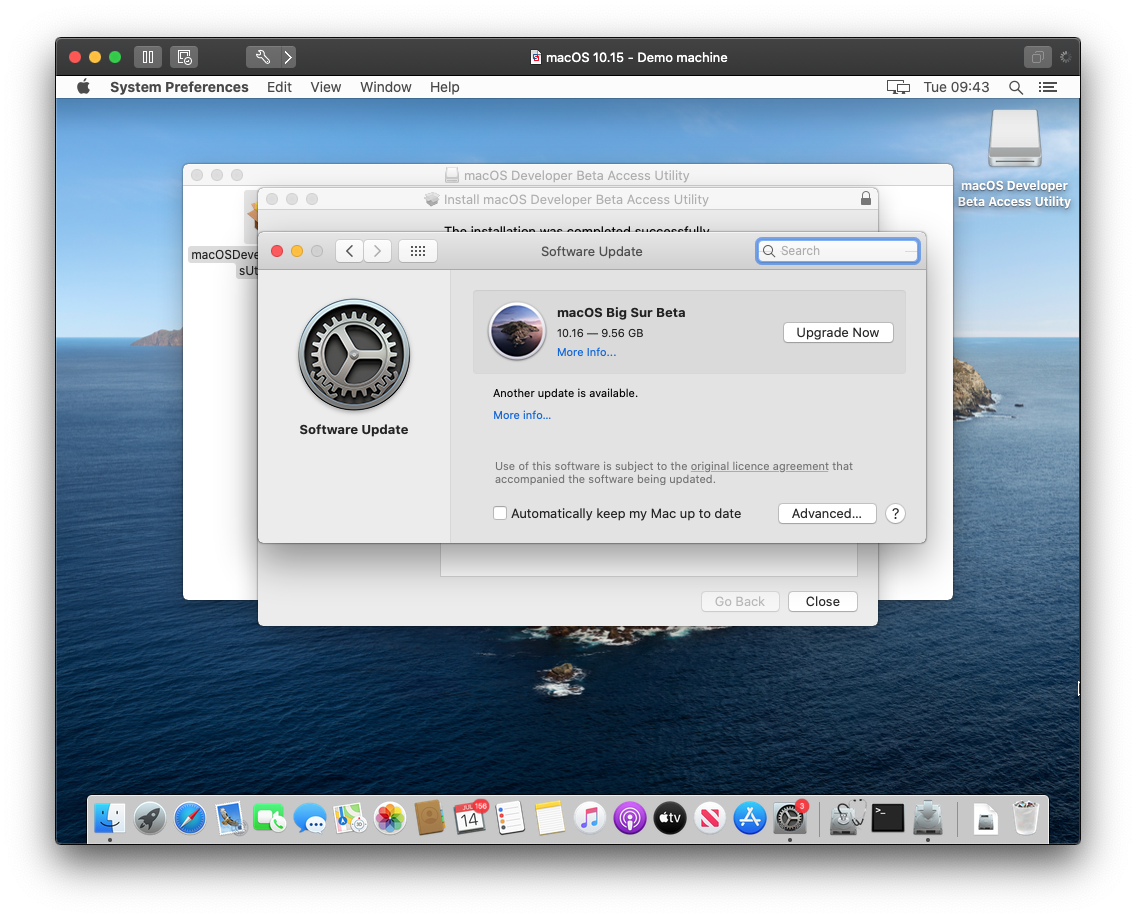
This will download the beta installer and allow you to update the OS to the Beta version. Once the download completes it should open the installer automatically, if not click the installer icon that should now be in the dock. Click through the initial license screens etc to start the installer: 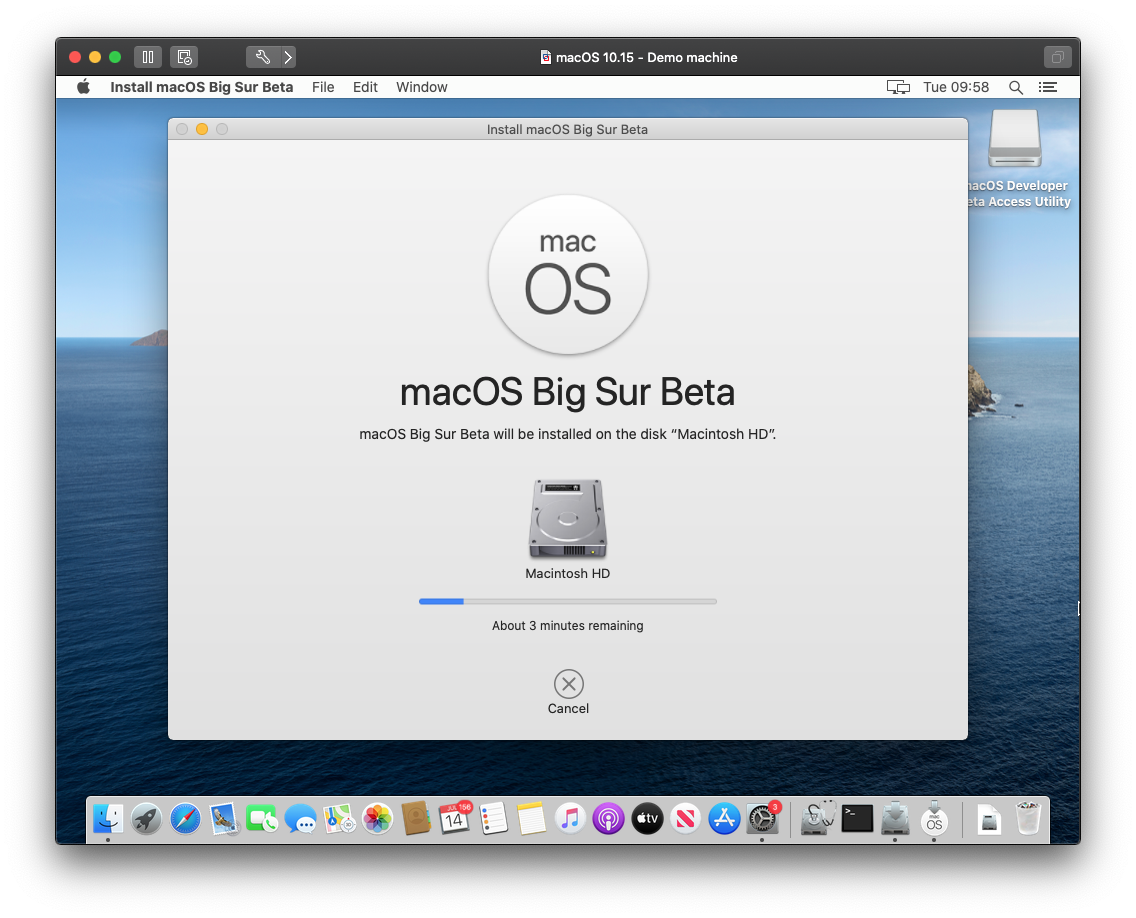
This will now take some time! I assume the faster your host machine the faster the install will proceed. In any case ignore the progress bar and wait. When the installer completes it will reboot the machine and continue installing: 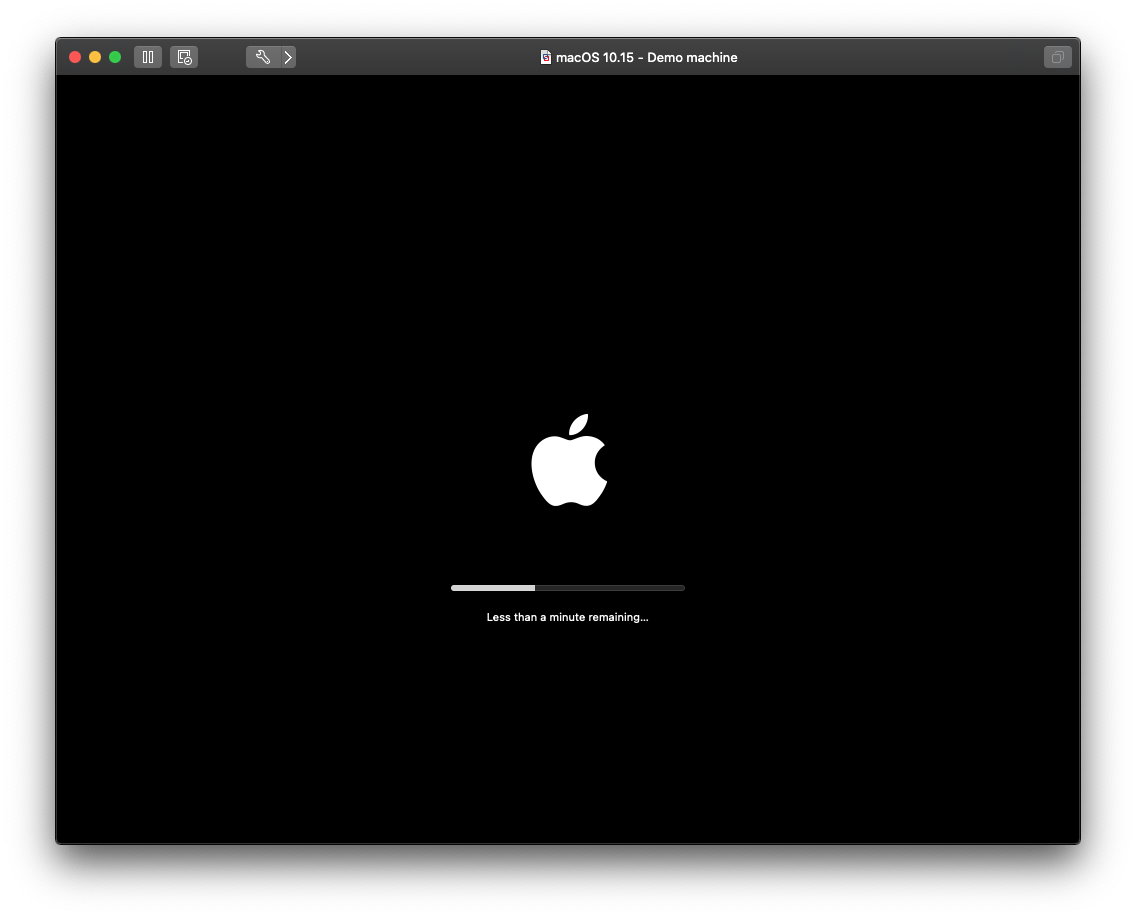
Again, ignore the progress bar and wait. This can take a long time and the VM appears to not be doing anything at certain points. But sit tight and wait. One thing to note is don’t let your host Mac sleep during this time as I have found it will affect the install process. It can be tedious, but keep an eye on it and wait for it to complete.
If everything has gone as expected, eventually the installer will complete and boot into the Beta OS. Again, the first boot may take longer than normal, but eventually you will be able to login to your new VM running the latest Beta of MacOS: 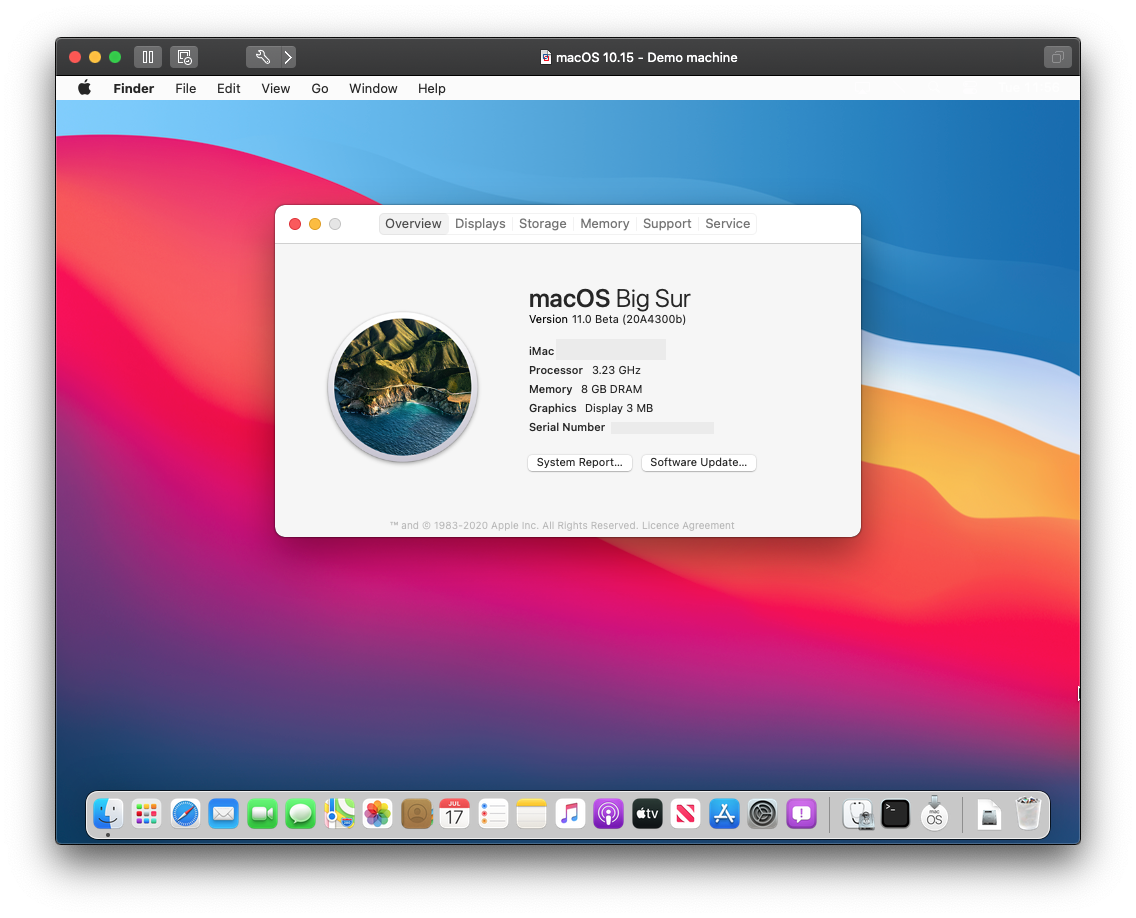
And that is it! Complete!
The Mr Macintosh guide, from which I learnt about the VM configs, describes another method for building a non-booted installer VM image using the installer software. This is another way to get the base OS installed and may be quicker than the initial process I describe here, however I have had mixed results and prefer building the release OS VM from scratch and tailoring things after the fact. Which ever way you choose, I hope this has been useful. Enjoy!